Now, I had never been to Arizona. It wasn't even on my radar. But, a month or two later, I found out I'd be in Phoenix for a conference in early December. You can probably imagine how quickly I dug out that address and sent David an email.
He responded and we communicated back and forth. Within a few weeks, he had - incredibly kindly, to say the least - set me up with a personal tour of the silo. When I arrived at the Titan Missile Museum on December 6th, I met David and a former Missile combat crew officer. Over the course of a few awesome hours, I got to climb up, through, down, and around the complex with two personal tour guides. It was an incredible experience, a wonderful history lesson, and an amazing illustration of just how differently we operated during the Cold War.
Follow along below for photos from my tour of the museum.

Topside of the missile complex from outside the security fence.


Stairway from the topside to the Blast Lock Area - crews had to pick up phones and verify secret codes at 4 or 5 different doors before they ultimately gained access to the complex.

Exterior blast door at the entrance to the Blast Lock Area, built to withstand 1000 psi.

Control Center - note one of the massive springs that supports this floor of the complex across the room.

Control Center - the cabinets on the right were originally full of guidance computers; they were replaced by a single guidance computer during an upgrade in the 1970s - technology improves quickly!

Control Center - note the slack in every cable; the entire complex is suspended by springs that hold it 12" away from the outer concrete shell to survive the shock of a nearby nuclear blast.

Control Center - the two officers on duty each had their own padlock (they purchased it on their own and only they knew the combination) so both people were required to open the safe to access the secret codes in the event of a launch command.

Control Center - this is the launch control board that displayed the stages of the launch sequence.

Sleeping Quarters - pretty spartan! Crews rotated on 24 hour alerts the entire time the complex was active. This and the kitchen were the only places they were permitted to be alone.

Sleeping Quarters - you can see the 12" gap between the floor and the outer concrete shell, along with a copper grounding strap.

Cableway connecting the Control Center and Silo - fully suspended and isolated from the outer concrete shell by massive hydraulic pistons.
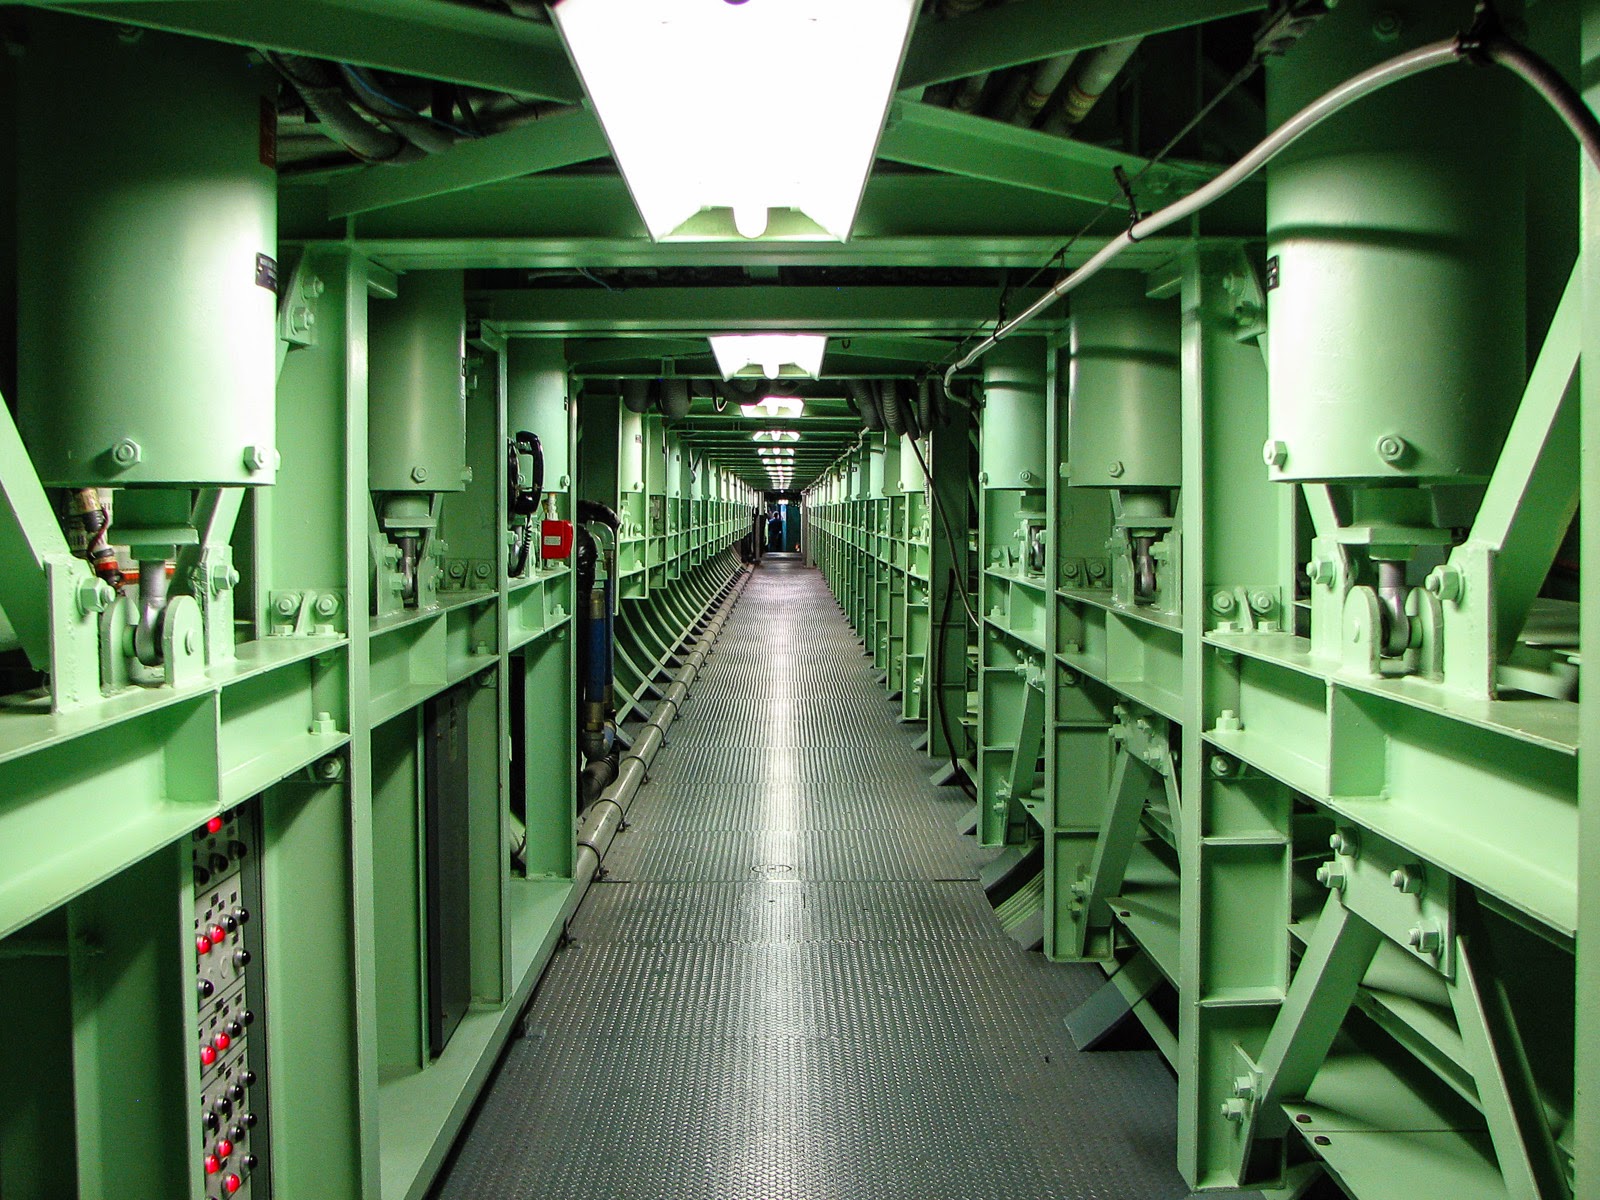
One of the many massive shock absorbers in the cableway that connects the Control Center and Silo.

Level 2 of the Silo - this is what you see immediately after crossing the Cableway from the Control Center.

T'was a festive season to visit a former nuclear missile silo!

Looking down at the retractable work platforms and Titan II from Level 2 of the Silo.

Look closely and you'll get a good idea of when this complex was decommissioned.

Like every critical component in the complex, the lights were supported by long springs to cushion against the shock of a nearby nuclear blast.

Significant slack was left in all wiring and hydraulic lines to withstand the shock of a nearby nuclear blast.

The collection of air tanks that supplied pneumatic power to the complex on Level 7 of the Silo.

Manual shutoff valve that allowed the crews to run launch sequence drills without actually flooding the silo with thousands of gallons of water.

Base of the Titan II missile on the hardstand (engines removed) - the entire 135 ton missile rested on 4 small explosive bolts that detonated at launch.

Looking up from Level 7 of the Silo.

Looking down into the flame deflector; at launch, thousands of gallons of water were released, which instantly turned into steam to help reduce shockwaves within the complex.

The hardstand (that the missile rested on) was attached to and supported by these massive spring mounts, which were secured to the silo at the missile's center of gravity to increase overall stability and withstand attack.

Looking up from Level 7 of the Silo.

One of the water injection nozzles below the missile; at launch, thousands of gallons of water were released,which instantly turned into steam to help reduce shockwaves within the complex.

Looking up from the flame deflector; the work platforms on Level 7 are all extended above.

Note the areas with and without rivets - the missile structure was reinforced around the fuel and oxidizer tanks.

The hardstand (that the missile rested on) was attached to and supported by these massive spring mounts, which were secured to the silo at the missile's center of gravity to increase overall stability and withstand attack.

View of the missile from Level 5 of the Silo.

The hardstand (that the missile rested on) was attached to and supported by these massive spring mounts, which were secured to the silo at the missile's center of gravity to increase overall stability and withstand attack.

Backup diesel generator on Level 3 of the Silo. In the event of an attack, the entire complex was sealed from the outside - so the generator would only be able to run on (and exhaust into) whatever air was trapped in the silo.

View into the missile - you can see the forward dome of the oxidizer tank at the top of Stage I.

View into the missile at Level 3 of the Silo - you can see the forward dome of the oxidizer tank at the top of Stage I.

The chilled water system, which cooled the entire complex, located on Level 2 of the SIlo.

One of the primary communication antennas and a hardened backup antenna that would have remained underground unless the primary was destroyed by a nearby nuclear blast.

Lights and a claxon atop poles on the topside that would have warned of an impending launch.

Topside of the Titan II launch site. You can see the rails that the silo door rode on in the background.

These radar surveillance security systems formed a ring around the silo topside and were the primary form of security at all missile installations. Extremely sensitive, they would sound a loud alarm in the control center if anything crossed their invisible beams. Then, security forces from nearby Davis-Monthan AFB would be dispatched to investigate. Given the secure nature of the missile complex, crew members would never go outside themselves.

If anything triggered the radar surveillance security system (usually coyotes) MPs from Davis-Monthan AFB would be dispatched to the site in a Jeep like this to investigate.

Looking down into the silo from the topside; the closure door is now permanently fixed in a partially open position.


The silo door has been partially cut away - you can see the 3" thick steel. Below that was more steel and concrete. All told, the original door weighed 743 tons, rode on rails, and could be opened in 20 seconds.

Stage I engine assembly.


Stage II engine assembly.

As I hope you have seen, it is a spectacular museum and very worthy of your visit. I'm grateful I was able to take advantage of such a great opportunity. Let me once again thank David for his generosity and hospitality. If you're ever in the Dayton area again, David, there is certainly a Cub ride with your name on it!


